Extra functionality
Compiling via dgui.py
dgtools is composed of three simple programs that work together to compile, simulate and inspect
software for the Digirule.
To make these more user friendly, dgtools incorporates a text based graphical user interface that gathers
input from the user and orchestrates the rest of the build process. A screenshot of that is available in
the following figure:
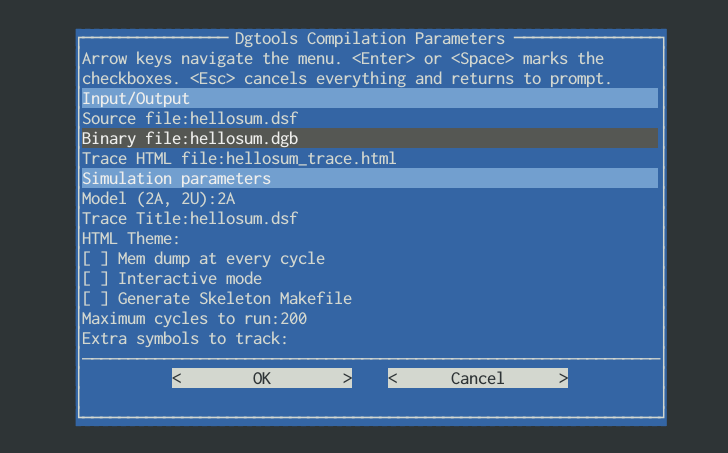
The dgui.py script invoked on simpleadd_1.dsf through a relative path.
The dgui.py can be invoked at any point in the filesystem and only requires that the .dsf file that is
passed at its input is an existing Digirule Source File.
Once the parameters are set to the desired values, use the arrow keys to select <OK>, click enter and see
output for any messages on the compilation process either from dgasm.py or dgsim.py.
The dgui.py can also be invoked through the DigiruleASM build environment within the Sublime text editor.
Creating a skeleton Makefile
dgui can generate a skeleton Makefile for use with GNU make. With the
Makefile in place (that is, after the first time dgui.py runs):
Compilation comes down to
make htmlStarting from scratch
make clean
A Makefile is a great way of automating more “complex” processes when you are trying to document and showcase code.
If a Makefile is present in the current directory, dgui.py will pick it up and populate its fields with the
parameters stored in the Makefile.
DigiruleASM build package for Sublime Text
Sublime Text is a fantastic editor and through the use of packages it can morph into a minimal but powerful development environment.
dgtools includes a DigiruleASM build package (in extras/DigiruleASM-sublime.package) that once installed can
recognise .dsf files and automate the build process from within Sublime text.
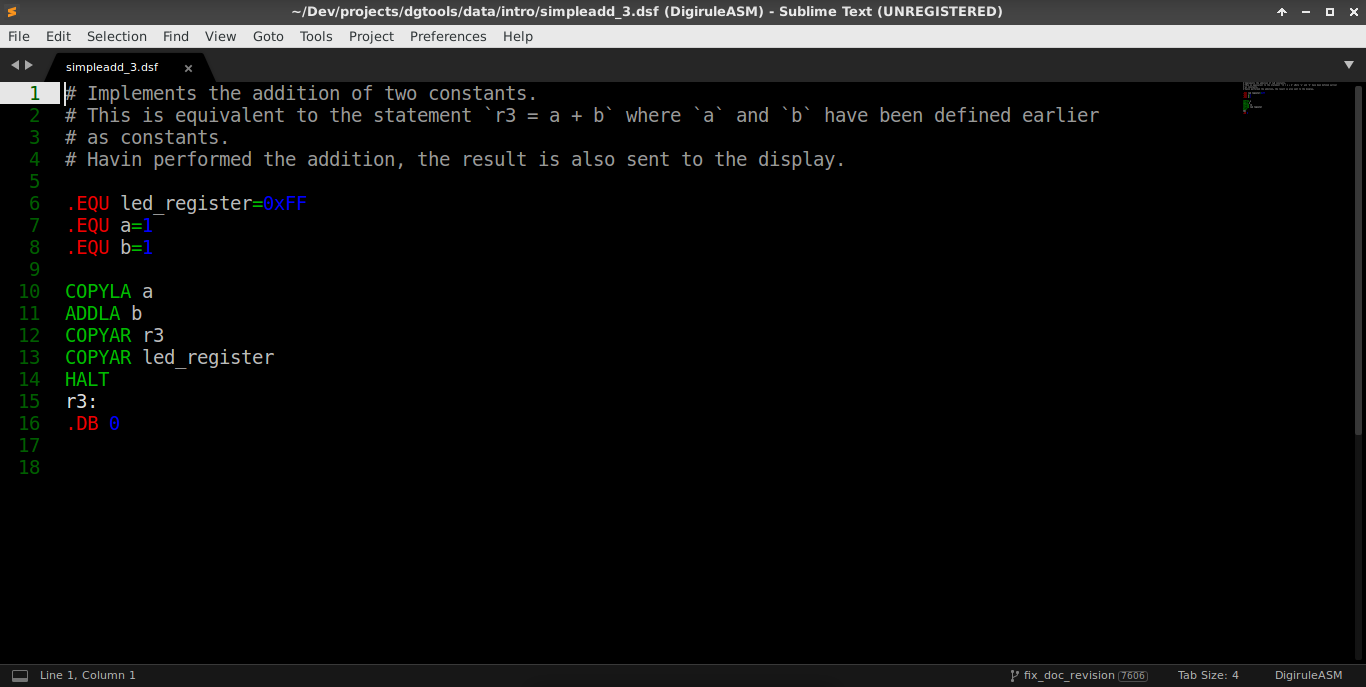
simpleadd_3.dsf through the eyes of the Digirule2ASM package…
This package offers a basic set of compilation options, right from the editor that can be selected
through Ctrl + Shift + B.
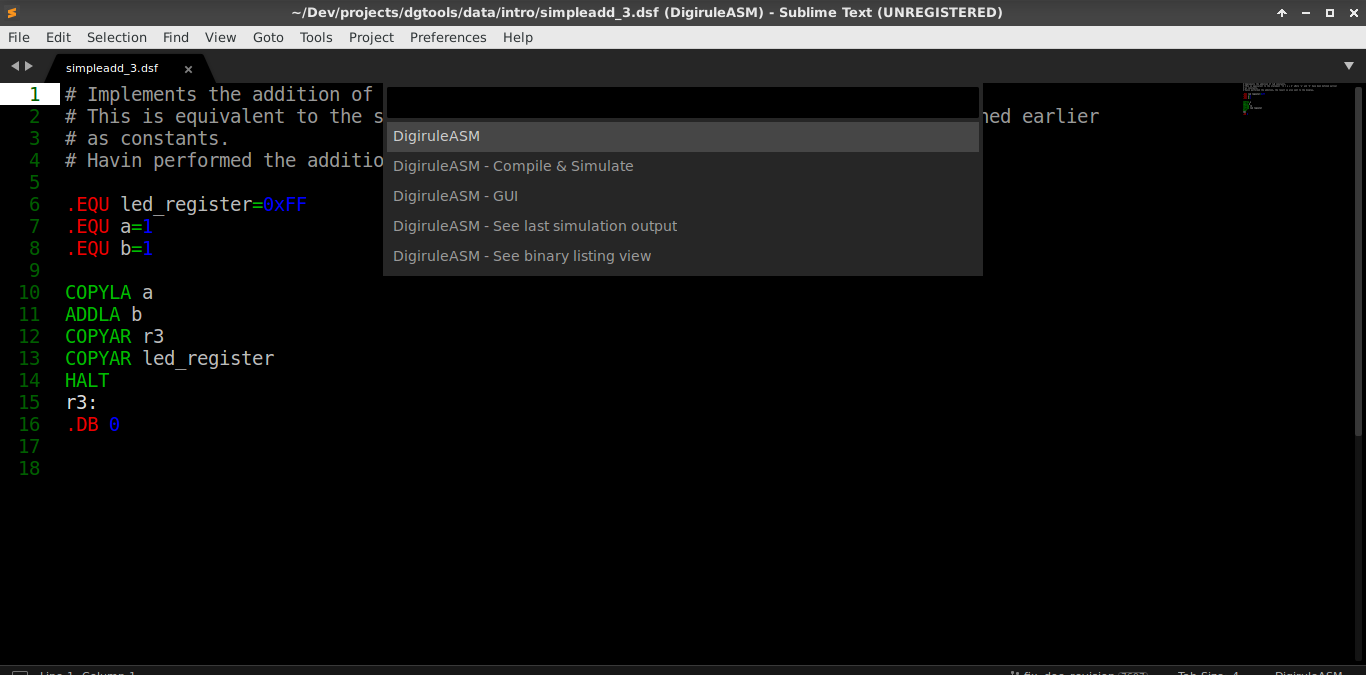
About to compile the code
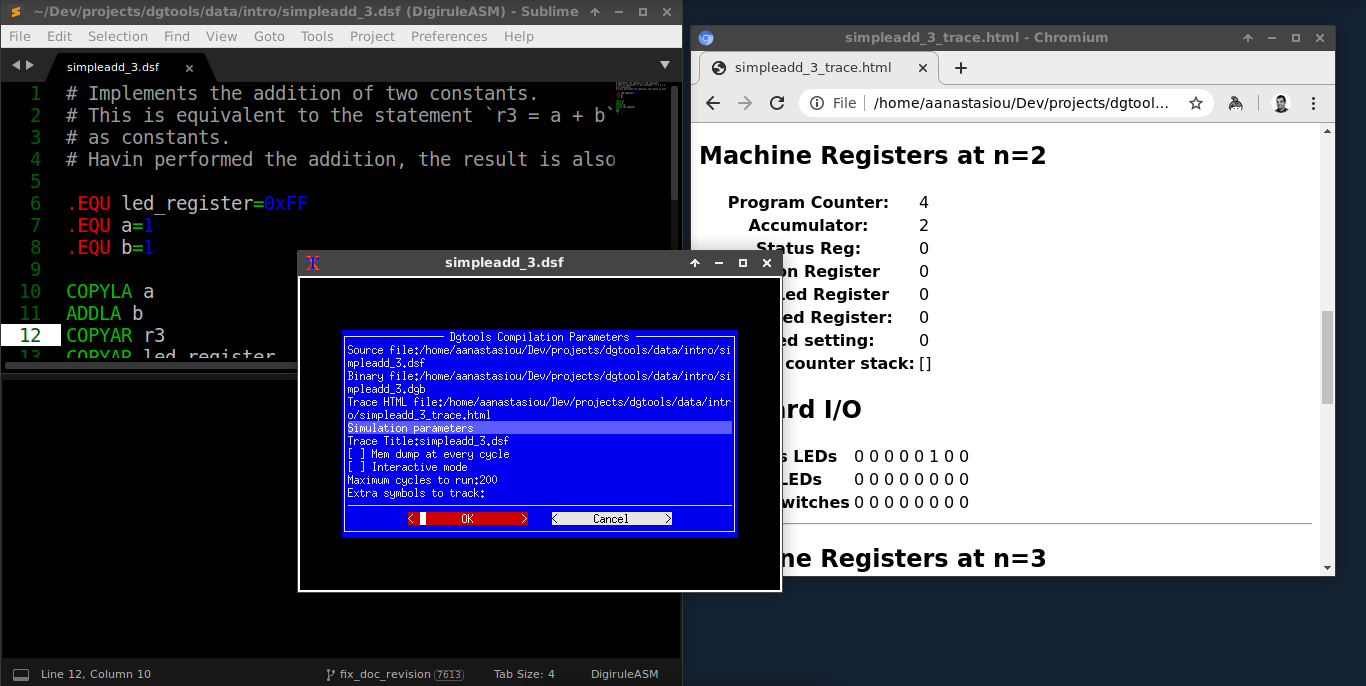
After code compilation, the DigiruleASM automatically launches the browser to see the output of simulation.
Note
The sublime text package requires xterm to be installed on your system. For more information about
xterm, see here.
Styling trace files
Trace files can be styled by adding a dgtheme.css CSS file, in the same directory with the HTML file of the trace,
or via builtin themes specified through the --theme parameter.
Writing your own dgtheme.css
The HTML file that dgsim.py produces is an article split into section. Each “clock-tick” is a section of
the article and each block of output (e.g. the memory dump, the I/O state, etc) is a subsection within that.
Therefore, it is very easy to select and style an element (or more practically a whole group of elements) through CSS selectors.
To make selection of certain elements even easier, the following classes are set:
table_machine_statetable_memory_spacetable_spec_symtable_onboard_io
These are all self-explanatory and refer to the content in the respective subsections.
In addition to those, the class current_pc is reserved to flag that cell of table_memory_space that
indicates the current position of the “Program Counter”.
Using a builtin theme
A built-in theme can be specified by using the -theme parameter on dgsim.py.
Built-in themes are CSS files too that reside in [dgtools package location]/css_themes/ and are simply copied
across to the *_trace.html file’s location.
Note
At the moment, the dgtools package comes with just one pre-defined theme, called dgbeos.
Linking to trace files
Trace files contain “named anchors” right at the beginning of each “Machine State” heading. These a tags
are prefixed with n followed by the clock-cycle number so you can link directly to a specific state even
within longer traces.
Say for instance you have a file up on jsbin.com and something…exciting (?) is
hapenning at n=2, you can link directly to that state with https://output.jsbin.com/huluzil/1#n2 .
Notice the #n2 right at the end of that URL and where the browser opens the document by default.